August 31, 2017

Ceaberry's Homesteading: My mom's garden

I am truly jealous of my mom's garden. She has raised beds enclosed with some deer fencing (it is the same method we used for the chicken run with t-posts and wire and Zip-ties). She uses Shenandoah Screened Topsoil (not a paid endorsement), it is located in Winchester, WV (can't get much more local than that for the quality we receive). I think her true key is the topsoil, because even though it is labelled as that it is a rich mixture that she DOES NOT fertilize. You will see how amazing that fact really is when you scroll through the photos below. She orders an entire pallet of topsoil bags in the 40lb bag quantity. Then, they sit at least 6 months but most of the bottom of the pile is over a year old and it is black gold when you open the bag. That is probably her second successful secret, she basically composts the top soil and adds just that to her garden.

Now for some pictures! She does "rowish" gardening in her raised beds. They are semi-permanent beds. For her beans she puts up more T-posts with that nylon square netting.


This is her beans, you are correct in thinking there are weeds in the front. Now they have been removed and the bush beans are happier. Her pole beans have lovely purple flowers and she always gets an amazing yield.


This is another raised bed. She has peppers, squash, tomatoes and corn growing in one raised bed. The sea of green is just amazing to watch!


Now this is the last true secret of my mother's garden. Sunflowers... Yup, sunflowers. Now by accident my mom discovered their very nice side effect. She got some plants from Burpee (not paid endorsement), and there was a sunflower seedling in it. Burpee seems to have this occur quite a bit with their seedlings. These are intentionally planted ones. The bees, oh the bees!! She doesn't have to worry about pollination, ever. She also has humming bird feeders nearby and butterfly bushes. For some reason she doesn't have cabbage loop worms either (lucky her) but does get Japanese beetles because of the blueberry farm down the road.

Now to see just a few things she harvested recently.


I know... you secretly are jealous too. Those cabbages were "as is" from the garden. Notice no holes!


This was a different day, her broccoli in there are actually the side shoots that are supposed to be tiny... yeah right. You can't see them but she gets 6 or so banana peppers every few days!

Why am I jealous? She doesn't fuss with her garden after planting and it grows despite the lack of tending. I think her three accidental things have helped her garden grow so well!
  1. Get good topsoil. 
    • My mom orders it from a mom and pop business but you can find it at Lowes in some places.
    • There is topsoil at Wal-Mart but we have found it to be wildly inconsistent. We got bags from two separate cities (about 3 hours apart or around 100 miles), but the SAME topsoil was rich and black at one place and completely clay at the other place. I am not kidding we bought them within a week of each other and the only reason we bought them from two different places is because we liked the first stuff so much we had the truck in another city near us and decided to get more... which was clay... yucky. 
    • Read the labels, really. If you read what is in the bag it will help you decide what is best for your area and growing habits. You can get raised garden bed mix but we were lucky with a local producer.
  2. Let it compost
    • Buy some extra bags and let them sit, out in the rain and everything. My mom just piles hers up and forgets about it until she needs it. Little buggies (and composting worms) will get in there are really make it a treat. I suggest a tight stacking method and keep the area around free of tall grass, it may just bee too tempting to snakes otherwise.
    • You don't have to let it compost but why not? You are going to need to add to your raised beds eventually, having richer topsoil then when you started is always a good thing.
    • I put my bags my mom graciously gives me into my worm tub (upcoming post). I use that as a nice medium for the tub and I get back even better soil!!
  3. Bring in the pollinators 
    • My mom has found that sunflowers, butterfly bushes and hummingbird feeders are all she needs to bring in the good and keep out the bad. 
    • I have loads of flowers and multiple beneficial species. I also have deterrent species as well and it has served me pretty nicely. 
  4. Feed your garden
    • Feeding and fertilizing are two different things. My mom does not fertilize, she feeds. She puts eggshells and spent tea in her garden and that is it. 
    • I fertilize but I also amend my soil plus my worm bins and composting bins with tea, coffee, and eggshells. 
Happy Homesteading!


August 28, 2017

Ceaberry's Homesteading: Life Hack -- Plastic Bag Holder

So I have scouring Pinterest lately for ideas to do life hacks. I came across a plastic bag holder, with a nifty pull out feature. Now theirs looked a lot more professional, but I live on a homestead, "rustic" is kind of the description of everything.


I took a sparkling water bottle, that Mr. Farmer drinks, and I cut right where the label hits. Normally there is a small indention, it is a bit thinner and much easier to cut. I left about 1/4 of the bottle uncut for a hinge. 

Since I have children I got some lovely duct tape (that is the real name for the tape, the other is a brand of that tape), in pink kitty print. I taped around the edges and put a small tab on the front with a bit of double sided tape (or the duct tape rolled up to form double sided tape). 


Then I folded and rolled the plastic bags I had laying around and stuffed them into the bottle. I had to test it out of course! This was a Pinterest win for sure!


It was so easy that I made two! One for the house and one for the car!


On a side note, dealing with plastic bags. I sometimes get too large of trash can bags. So I put a hook on either side of my trash can (and on my smaller one that I use the plastic bags in) and it works like a dream. So that is two hacks for one post! Happy Homesteading!


Want to follow my wackiness on Pinterest? Click here

Ceaberry's Monday Musings: Background on Homesteading for Me

Happy Monday! I have been busy these last couple of weeks so my updates got a little sporadic. I am still working behind the scenes and on the homestead for some fun updates and useful information. This is my first year in homesteading and I have not gone completely gung-ho about it but I have done many things around the house and farm that will be making its way to you.

Life on a farm and living in an old farmhouse has it unique set of challenges. I am a stay at home mom with a side business that I have had for almost 8 years (coming up in October). There are a lot of stigmas to each descriptor of my life and it seems key to have so many descriptors that no one seems to know where exactly to place you. I am not a placeable object or a person that fits any kind of box, I love it that way but it isn't easy nor is it for everyone.

I watched a YouTube video of a the lovely personality Starry Hilder Off Grid Homestead. She discusses the fact that people get into homesteading and living off the grid, then they quit. The old adage is that you must do something for 30 days straight to make it a habit. Which is why I choose Lent to change things, you do something more, do something less, and help someone/thing out for 40 days. That is THREE habits that change all at once. Anyways, she was so deeply saddened that a certain couple chose to stop homesteading, but they both worked full-time and had 6 kids. Starry is normally very upbeat, wacky and cheerful. Even if you don't like homesteading, she will make you want to do at least some part of it, she shows the grittier parts of that lifestyle without bemoaning it.

Why I chose her video as an example is because it resonates with me on a different level. Haven't we all been afraid of something we tried and now loved? Wasn't there always times we wanted to throw in the towel (or did) only to look nostalgically back on that thing we loved, wishing in some small part we still did that, were still a part of that community? We can find so many excuses and reasons not to do something, and we all get overwhelmed at times. Homesteading is a task not be taken on lightly, nor is quitting homesteading either. You must be a certain type of person, we all have that potential to change into that type of person, but not everyone has them umph or gumption or want to do so.

Homesteading and "living off the grid" are two VERY different things, and very different lifestyles. One can homestead or live off the grid or both. I have a B.S. degree in Environmental Sociology and Zoology (don't try googling that as a degree, I had the opportunity to create my own degree major at West Virginia Wesleyan College), a B.A. in History, and a M.Sc (that's a UK Masters) in Human Osteoarchaeology. Yeah, you're think none of that has anything to do with homesteading or living off the grid, but it actually set me up to be the perfect person to have those ideals. Yes, I love to do my part for the environment, but I am not a fanatic and probably not as eco-friendly as I should be.

I will always be "on the grid," I do not want to live completely off the grid. I believe in environmentalism and consumerism (thus my none box type of personality, I blame it on being a Libra). You may not know my age, but I lived in a world without the internet, computers, and cell phones (my first one was in college and it was a pay-as-you-go). I didn't get my first Apple product (my computer I am typing this post with) until 2009. I didn't step into the world of Apps and such until 2011. Heck, I still had a tape player (walkman) until I was well into Highschool when finally my parents took pity on me and got me a CD player. People I saw the first DVDs, they were larger in the records!! So it is not all the electronics that keep me "plugged in." I am here for the community, the millions of people and the the think tanks of ideas for anything and EVERYTHING I want to learn about.

Now Homesteading, I decided that to change my life I needed to change my labeling of things. I live on a homestead. Instantly a sprawling farm and ranch style life comes to mind. That's all well and good but I live in rural West Virginia, that's not exactly the rosy picture my house paints (yet). My house is "rustic" and mostly neglected. In remedying the neglect I have made it turn more charming, and functional. To quote a recent Project Runway episode: I am Ballin' on a Budget.

Both topics take YEARS to accomplish. Please do not rush out and try to do all the things, it is hard to do. Changing to "homesteading" rather than "repairing neglect of a house steeped in so much family history is suffocating" made my mind more at ease and peaceful. I became determined, more crazed then determined, to get stuff done this year. After years of pregnancy and babyhood, and excuses as why I haven't done this or that, enough was enough. I started outside 30 minutes every day with the kids at the beginning of May. It was hot, it was humid, it sucked. The kids loved it. I slowly worked up to an hour before nap time, it was still hot and it still sucked but the enthusiasm of the kids and the nap that happened quickly there after was worth it.

Now I am outside about 4-9 hours at a time, if I am not there I am inside doing things that are homesteading indoors (like dehydrating vegetables or seed saving or fixing broken things around the house). On top of all of that I do my yarn business and I am a mom and housewife (means I do the chores and running of the house while taking care of my two children under 3). What does my husband do? He is a farm laborer on another farm and the only farm hand here on our family farm, plus he is a gatherer (he gathers wood, mushrooms, ginseng, extra wood, tools, and stuff I would end up throwing away later). We decided to put the kids bedtime (read that as off of us time) at 7-8 pm, to keep us from not having us or me or him time. Truly, a sanity saver.

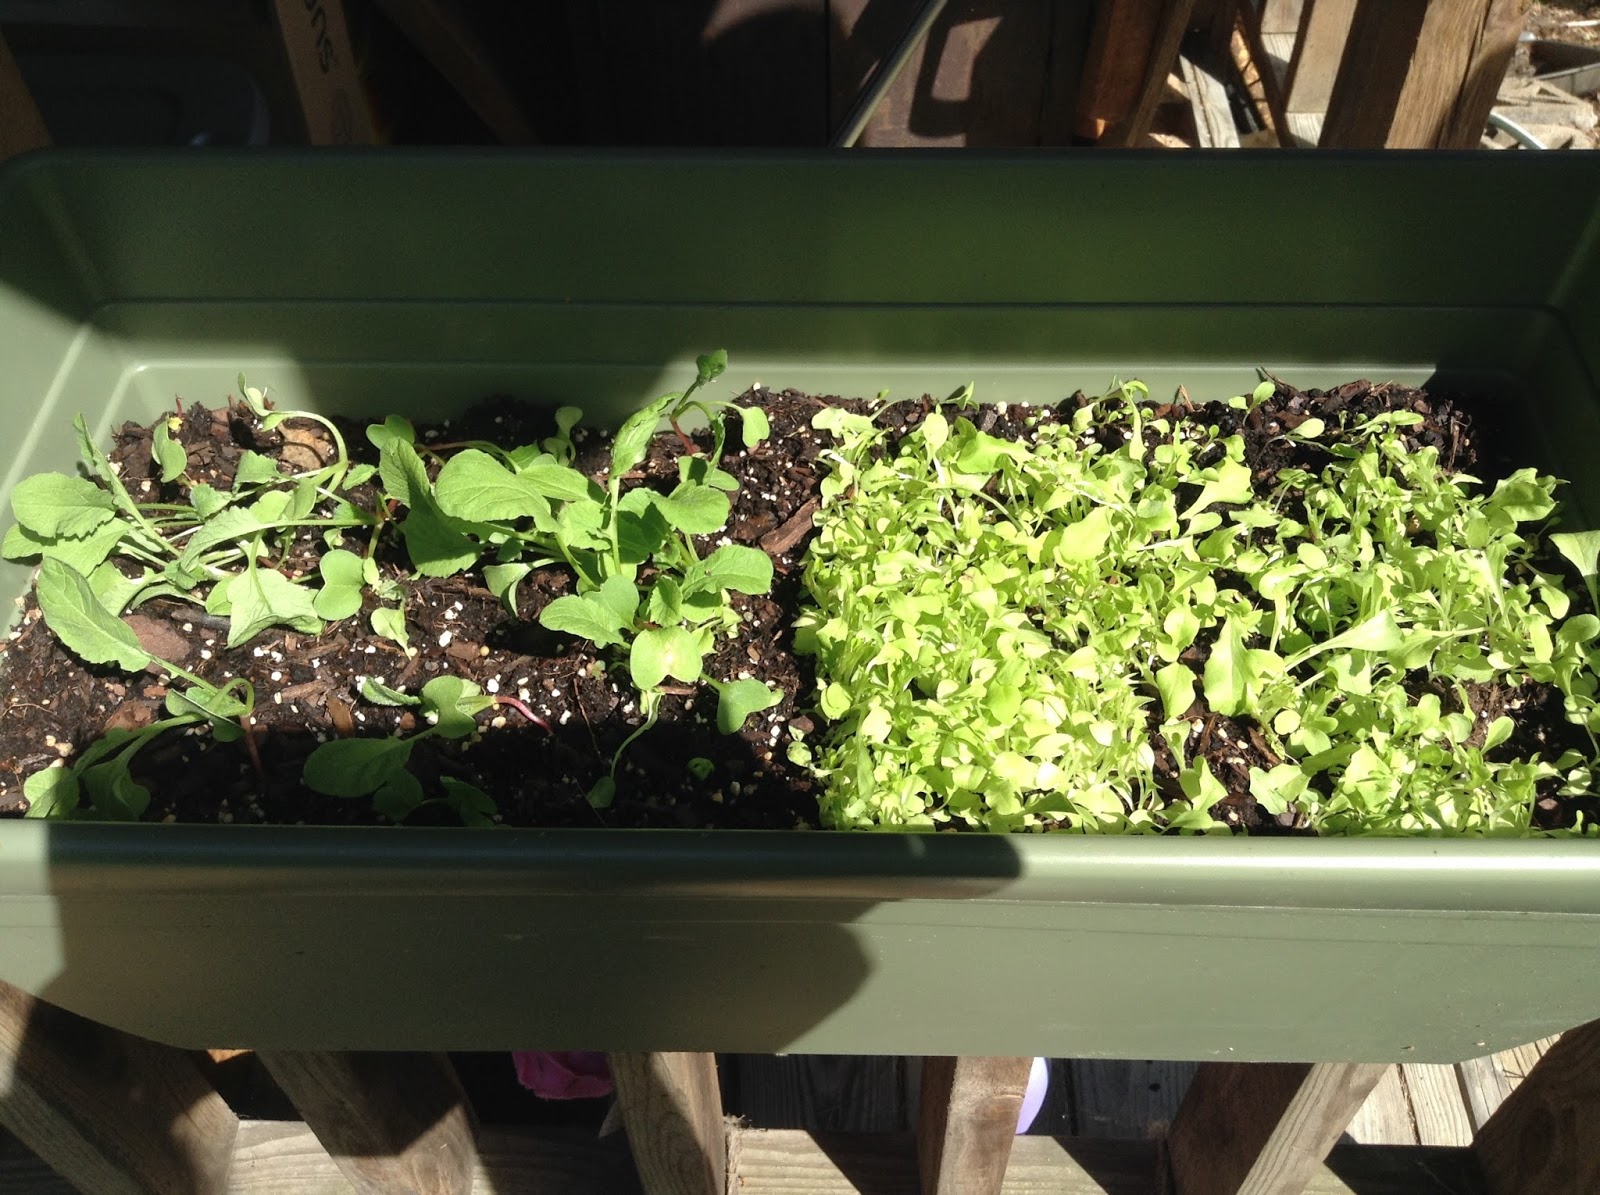
Homesteading, take it on piece by piece. I started with cutting down overgrown areas of my yard, which I am still working on but they are cut down, by hand might I add. I am not an in shape person nor am I abnormally strong, if you think you can't do it, try. Again I started with 30 minutes (you can start with less) and I started in the hottest months of the year while watching two kids. I then went to my garden, I started small. A raised bed we have had for years, and a container garden. Not everything made it (are cabbages are hilariously small). After that was the chicken coop. Now that was really my first step to homesteading. Choosing animals to raise is a really important decision. We have joked around about goats but chickens was really our Step 1 to becoming a homestead. Step 2 is next year with my garden expansion and revitalizing the space that is the hill (also add an e instead of an i) of forsythia. So next year will be all about the garden. I added worms and composting in the side mix, things that are by products of having a garden and chickens. They are small and require minimal effort and time. Step 3 will be a revamp of the inside of the house into a processing homestead that my husband is really excited about, something about canning jars just gets him in a happy mood (especially when they are filled with deer meat and deer jerky).

So I am going to end this massive post with this little lesson I learned from Starry: Take it slow and build up to it or you might overload and have to quit when life gets in the way. We live in a world where discomfort is remedy easily and the grit that people once had is slowly vanishing, but it is still there. My start to homesteading has been rewarding but not too terribly fun. It is the hard work that makes me keep at it (and maybe the 10lbs I have lost and the gorgeous tan I now possess). Even if you start with an herb garden in a small planter in your house, that is homesteading. It is giving up convenience in any way to provide something for yourself.

This is who I do it for: The next generation.
Yeah her hair is normally like this in the morning.

Sisters.

I think she was showing Blueberry the grass.
She loves her Blueberry kitty.

We were at the WV state fair. She was having fun in the kid's garden.

This is the look I get before she does something mischievous. I get this look... a lot. 

Having so much fun!
Happy Homesteading!! Want to see my ideas? Follow me on Pinterest!

August 21, 2017

Ceaberry's Homesteading: Summer recap

It is now Mid-August and I am looking towards fall. I will be not looking up at the eclipse that is happening today, be safe and smart about enjoying the eclipse. I have my garden winding down and in a near future video I will show you what my garden looks like now that some things have been harvested and my plans for next year. My next posts will be more about what to do with your harvests, big or small. To enable me to do this I have looked to good old Pinterest for inspiration and ideas and to YouTube for wonderful how-to videos. 


I hope your week is wonderful! Happy Crafting and Homesteading!

August 18, 2017

Ceaberry's Homesteading: Gardening -- Vermicomposting

Vermicomposting is raising worms for composting. You are raising live beings, albeit worms but they deserve respect for what they can do for you and your garden and in that turn your family and homestead. I started with a grey tub with holes in it but I ended up buying a Worm Factory 360 (not paid endorsement). It was an excellent decision to ensure my worms the best possible home and the most attractive option for us.

Here is my bin completely setup with the wet newspaper on top and the cardboard for the first week to keep the worms from leaving their new home. I ordered my worms from Uncle Jim's Worm Farm (not paid endorsement). They had what I thought was going to be a mass exodus from my worm bin. A lot of people, including the website said they would be thin and not very mobile. I live less than 6 hours from their worm farm shipping place so my worms were very very lively and plump. They went EVERYWHERE. All along the sides and some fell off. I had the forethought to put the worm bin over the grass for the first couple of hours. They were climbing all over the outside bin. I calmed myself and prepared for the worst, they were all going to leave my bin and I would have to reorder my 250 worms.

This is why they tell you to leave the worm bin alone for 24 hours. The worms were just exploring and the few that got away in the first hour (10 of them) were just wild explorers. They settled in just nicely and the bin is teeming with more then my original 250 worms. I have all the tiers set-up, and when I harvested a tier for some seedling starting I got an interloper.

That is Blueberry, one of the resident kittens. She is a "cow" cat, how fitting...

So worms eat food, I do the blender method, well more like the food processor method but you get my drift. From these next few pics I now pre-crush my egg shells making this process a bit cleaner and easier. I made my own baby food for my second child and I bought this now dust collecting thing to help me put the food in pouches. She quickly went from puree to solid due to 6 teeth erupting in a month so it was discontinued for use in our house. I pulled it back out to start making my worm gruel. 

It has a plunger with it and the bags are reusable, especially since they are for worms. I fill these baggies and cap them and freeze. Then I just thaw out what I need to feed them and voila, worm gruel at the ready!


Try your hand at worm composting! I had a rubbermaid tub that did pretty well and now the Worm Factory 360. My next adventure is going to be a worm farm in an old bathtub we have just laying around!! Stay tuned for that fun coming in a few weeks!!


August 15, 2017

Ceaberry's Homesteading: Gardening -- Three quarter growing

We were now into July and everything stalled growth because of 3 weeks of absolutely no rain.

However, my oldest is pretty proud of her growing garden.

The snapdragons have bloomed twice already and we have some gorgeous colors going on right now.


I added some herbs. Parsley (which was eaten by a opossum), basil, three kinds of mint (chocolate, sweet, and spearmint), and lavender plants.


 Later in mid-July we have a pretty cool garden growing. You can see the snapdragons have gone to seed, the celosia is coming up nicely, the plants are all doing well and we added broccoli and cabbage to the raised beds! Next time you will see what after the first few harvests look like plus the videos to come will show off the garden!


August 14, 2017

Ceaberry's Homesteading: Gardening -- Starting to Come to life

Before I show the updates of the garden in mid-June I have a picture of the bushes after I hand pruned them. These bushes were over 14 feet in the air and the now sunny spot that was created was ALL in shade. If you're worried about the bushes surviving, I can say now in August the Rose of Sharon is blooming it's three flower colors and even though I had the back lilac chainsawed to the ground (due to rot) it is coming back full force already. This was actually best for the lilac bushes because the rot had set in pretty deeply and if I had let it continue there would have been no bushes in about a year or so. 


Ok now to the garden. In mid-June it did not look like much from far away, mostly a flower garden. This was great since it had color while waiting for the veggies to grow.
In the front, you can see flats of tomatoes that would become my plants that have been so successful!
These are my radishes and lettuce. In later videos you will only see the radishes. These are not the same as the ones pictured. Unbeknownst to me around this time cut worms were growing in my container. The moths are attached you young soft growth (the lettuce since it isn't head lettuce) and I had TWELVE in this small container. I woke up one morning to all of my greens just gone. I replanted after I sifted the soil. Now those radishes have been picked and one has left to seed. Lesson learned.

These are my little corn sprouts. Now a few of these were moved into the raised bed and the ones left in the pot got tassels but never any silks, the ones in the raised bed however have silks and tassels. Gardening ....*eye roll*

During most of June my corn plants hosted small yellow garden spiders. They stayed there all month until I finally moved them into my garden and I still see them around from time to time.

My pink lemonade blueberry bush had the berries finally starting to change from green to pink.

In the other pots, my cotton in the center pot is coming up well. It will be the only pot to survive, the other two are repurposed for other things later in the season... Gardening.

In this picture, I have planted my peppers and tomatoes with the onions in the center of the raised bed.


Now for some pretty flowers. These are my snap dragons with the Hawaiian 5.0 in the middle. Hindsight, I will put the purple flowers in their own container next year.
 

These are my marigolds and celosia flowers.  It took until mid-July for the latter to bloom but my marigolds have been going strong all summer!

Here are my begonias. They look exactly the same as they do in this picture today in August.

I got all my flowers and my peppers from a local grower, the rest of my stuff is from Burpee's or Crazy Harry's Greenhouse (not a paid endorsement). 


August 13, 2017

Ceaberry's Homesteading: Gardening -- Season Begins

This is my series on my small little garden this year. We decided to forgo our bigger garden this year but next year I have plans of expansion. This section deals with the garden I started way back in May 2017.
I started with a few containers of plants. I have a lovely flower plant, two pots of deck corn and a patio railing of half lettuce and half radishes.

I have two "raised beds," one protected and one not so protected. The one that is protected just has last year's onions in it. The one that was unprotected has 3 pots of cotton (legal in my state). The main thing though is the rose of sharon and lilac bushes behind the raised bed. You can see one lilac bush is really over grown and tall, all three were very poorly maintained.

I took my hand saw and cutters to the rose of sharon and hacked away at the bush with vengeance. There is also forsythia growing into the raised bed. Please, if you don't plan on maintaining a forsythia, DO NOT PLANT ONE. I have been epically fighting this battle for FOUR years and I am losing most years, not next year but that is a different post.

In the next set of photos you can see me cedar trees that are on our front lawn. One has been slightly pruned and the other has been half pruned. I wanted an archway for the mail people to be able to walk through and us if we parked up there.

So out came the loppers and hand saw again. I worked for 3 days getting everything trimmed. I have two small kids and were only able to do this an hour a day. 

So that was the beginning of my gardening for the year. I add a lot more plants as time progresses. Happy Homesteading!

August 12, 2017

Ceaberry's Homesteading: Dishwasher woes

We had an old dishwasher that was, well... a pain. It was a problem and it was small. Little did I know what I was getting myself into when I proclaimed one day that enough was enough. About 2 months later the dishwasher started leaking water everywhere in my kitchen and shorted itself out! That was it, it was time for a new dishwasher. I actually had to wait a couple months to have the money to buy said dishwasher and hand washing entailed 2 dish drains a day. So I went to my big box hardware store, I got myself a new dishwasher.


That was the end of the "easy" part of this process. If you have an old house that has been majorly neglected for repair for 20 years then you may know what may have come next. My old dishwasher was put into place in the 1990s. It wasn't a bad dishwasher and lasted until 2017 so one can't really complain, but you leak nasty water on my floors, well your days are done. So I took off the kick plate, and my first "surprise" awaited me.

What I saw would be a home inspectors worst nightmare. I really need that Holmes guy at my house... well he might condemn it but anyways back to the dishwasher. The wires underneath the dishwasher were not even in a housing or casing. they were twisted together and capped (with the wrong size caps might I add). there was no ground (we don't have grounded outlets in 80% of our house so no surprise there. As I cursed slightly, I undid all the wires and the fittings. Pulled the dishwasher out to find my next "surprise."

The paneling on the side of my dishwasher was just jigsawed cut so there is actually no real pieces for my new dishwasher to screw into so that it is sturdy. No problem they can be screwed into the bottom of the counter... I put my new dishwasher to be set into place. That's where my next "surprise" happened. The copper tubing was too long so I had to not-so-gently bend it so I could push the washer back. The wires as I said weren't long enough to go into the main housing for them, and the ground... non-existent. After I sorted all of that out, the install was the monotonous checks, and the side flanges causing me issues because the side panels were real so they kept popping out.

Then came time to screw it in to the bottom of my countertop. It is an MDF countertop and the other one wasn't screwed in, well it had been but the screws apparently fell out because the holes were a complete mess and with YEARS of neglect (remember I have been in this house at least 4 years myself), I could not secure my dishwasher. More cursing later I just decided to get it in and figure that out later.
Dishwasher installed and washing it's first load.

Two loads later, there was a plastic burning smell. I found out that that the wires arced in the caps and melted one of the caps. But I smelled it early enough on that it just put a small hole in the caps. I had my father come over, he lengthened the wires, grounded my dishwasher to my copper sink pipes, and made sure the wires were more then secure but completely waterproof. Problem solved. Now to work on not being able to attach my dishwasher to my countertops.

I decided on the most invasive route after trying duct tape, wood glue and trying different spots to drill. My kid tipped the dishwasher towards her one day and that was the final straw. I took a drill bit and drilled through the top of the counter top. Then I got a bolt (so it was flat on the bottom and wouldn't scratch my dishwasher top. I added a washer and bolt to the bottom and there you have it, it was completely secured to my countertop. However because I used bolts a bit was sticking up that was sharp and in the way. I tried wood glue molded in shake straws on top of them, that didn't work. So my mom found these resin beads that were brown. I took a drill bit and hollowed out the back (which was flat) until they fit. I used a dry erase maker on the top of the bolt to see where I needed to take some more off so it would sit level. I added wood glue and here is the result.

So if you are thinking of replacing an OLD dishwasher, look at attachment sites and look at wiring. My house was built in the 50s and pretty much my wiring is original. We live in a rural area so the person who put in my old dishwasher wasn't so "professional." If you find wiring problems call an electrician friend in to help. I could have done everything my father did to the wiring but it was nice not have to do it (if you catch my drift). So good luck and Happy Homesteading!

August 11, 2017

Ceaberry's Homesteading: Chickens -- Egg Collecting

The reason I agreed to 4 more chickens was for the eggs. When I first got my pullets our neighbor graciously gave us two dozen eggs. I think she wanted to show that they would be small in the beginning but would increase in size eventually.


So the first day we got the chickens, they didn't lay any eggs. We received them around 6 PM so they were done laying for the day. However, the next day the nesting boxes proved to be perfect for them. 


There are dummy eggs in the nest boxes as well (the two larger ones). My kids were really excited to collect some eggs from the nesting boxes.


These are our first few eggs!! We have gotten over 60+ since getting the 4 hens and our pullets should start laying at the end of this month!