Showing posts with label building. Show all posts

September 18, 2017

Ceaberry's Homesteading: The Chunnel

For those of us not in Europe or the UK, using the word chunnel isn't confusing. The Chunnel in the UK and Europe connects the two places. It is the channel tunnel aka the Chunnel. This is a homesteading blog, so a chunnel is a chicken tunnel. I built one using 2x2s and some chicken wire. It is going to be attached to the second coop at some point. It was a very easy construction. I made a rectangle, then attached risers to a support beam at the top. Covered with chicken wire and made a makeshift door for now. I did make the support beam at the top stick out because I was going to move it all around the yard.


Hope that gives you some inspiration to try and make a chunnel yourself. I have a second design in the works but more on that later. Happy Homesteading!

August 21, 2017

Ceaberry's Homesteading: Summer recap

It is now Mid-August and I am looking towards fall. I will be not looking up at the eclipse that is happening today, be safe and smart about enjoying the eclipse. I have my garden winding down and in a near future video I will show you what my garden looks like now that some things have been harvested and my plans for next year. My next posts will be more about what to do with your harvests, big or small. To enable me to do this I have looked to good old Pinterest for inspiration and ideas and to YouTube for wonderful how-to videos. 


I hope your week is wonderful! Happy Crafting and Homesteading!

August 12, 2017

Ceaberry's Homesteading: Dishwasher woes

We had an old dishwasher that was, well... a pain. It was a problem and it was small. Little did I know what I was getting myself into when I proclaimed one day that enough was enough. About 2 months later the dishwasher started leaking water everywhere in my kitchen and shorted itself out! That was it, it was time for a new dishwasher. I actually had to wait a couple months to have the money to buy said dishwasher and hand washing entailed 2 dish drains a day. So I went to my big box hardware store, I got myself a new dishwasher.


That was the end of the "easy" part of this process. If you have an old house that has been majorly neglected for repair for 20 years then you may know what may have come next. My old dishwasher was put into place in the 1990s. It wasn't a bad dishwasher and lasted until 2017 so one can't really complain, but you leak nasty water on my floors, well your days are done. So I took off the kick plate, and my first "surprise" awaited me.

What I saw would be a home inspectors worst nightmare. I really need that Holmes guy at my house... well he might condemn it but anyways back to the dishwasher. The wires underneath the dishwasher were not even in a housing or casing. they were twisted together and capped (with the wrong size caps might I add). there was no ground (we don't have grounded outlets in 80% of our house so no surprise there. As I cursed slightly, I undid all the wires and the fittings. Pulled the dishwasher out to find my next "surprise."

The paneling on the side of my dishwasher was just jigsawed cut so there is actually no real pieces for my new dishwasher to screw into so that it is sturdy. No problem they can be screwed into the bottom of the counter... I put my new dishwasher to be set into place. That's where my next "surprise" happened. The copper tubing was too long so I had to not-so-gently bend it so I could push the washer back. The wires as I said weren't long enough to go into the main housing for them, and the ground... non-existent. After I sorted all of that out, the install was the monotonous checks, and the side flanges causing me issues because the side panels were real so they kept popping out.

Then came time to screw it in to the bottom of my countertop. It is an MDF countertop and the other one wasn't screwed in, well it had been but the screws apparently fell out because the holes were a complete mess and with YEARS of neglect (remember I have been in this house at least 4 years myself), I could not secure my dishwasher. More cursing later I just decided to get it in and figure that out later.
Dishwasher installed and washing it's first load.

Two loads later, there was a plastic burning smell. I found out that that the wires arced in the caps and melted one of the caps. But I smelled it early enough on that it just put a small hole in the caps. I had my father come over, he lengthened the wires, grounded my dishwasher to my copper sink pipes, and made sure the wires were more then secure but completely waterproof. Problem solved. Now to work on not being able to attach my dishwasher to my countertops.

I decided on the most invasive route after trying duct tape, wood glue and trying different spots to drill. My kid tipped the dishwasher towards her one day and that was the final straw. I took a drill bit and drilled through the top of the counter top. Then I got a bolt (so it was flat on the bottom and wouldn't scratch my dishwasher top. I added a washer and bolt to the bottom and there you have it, it was completely secured to my countertop. However because I used bolts a bit was sticking up that was sharp and in the way. I tried wood glue molded in shake straws on top of them, that didn't work. So my mom found these resin beads that were brown. I took a drill bit and hollowed out the back (which was flat) until they fit. I used a dry erase maker on the top of the bolt to see where I needed to take some more off so it would sit level. I added wood glue and here is the result.

So if you are thinking of replacing an OLD dishwasher, look at attachment sites and look at wiring. My house was built in the 50s and pretty much my wiring is original. We live in a rural area so the person who put in my old dishwasher wasn't so "professional." If you find wiring problems call an electrician friend in to help. I could have done everything my father did to the wiring but it was nice not have to do it (if you catch my drift). So good luck and Happy Homesteading!

August 9, 2017

Ceaberry's Homesteading: Chickens -- Adding a Grazing Frame

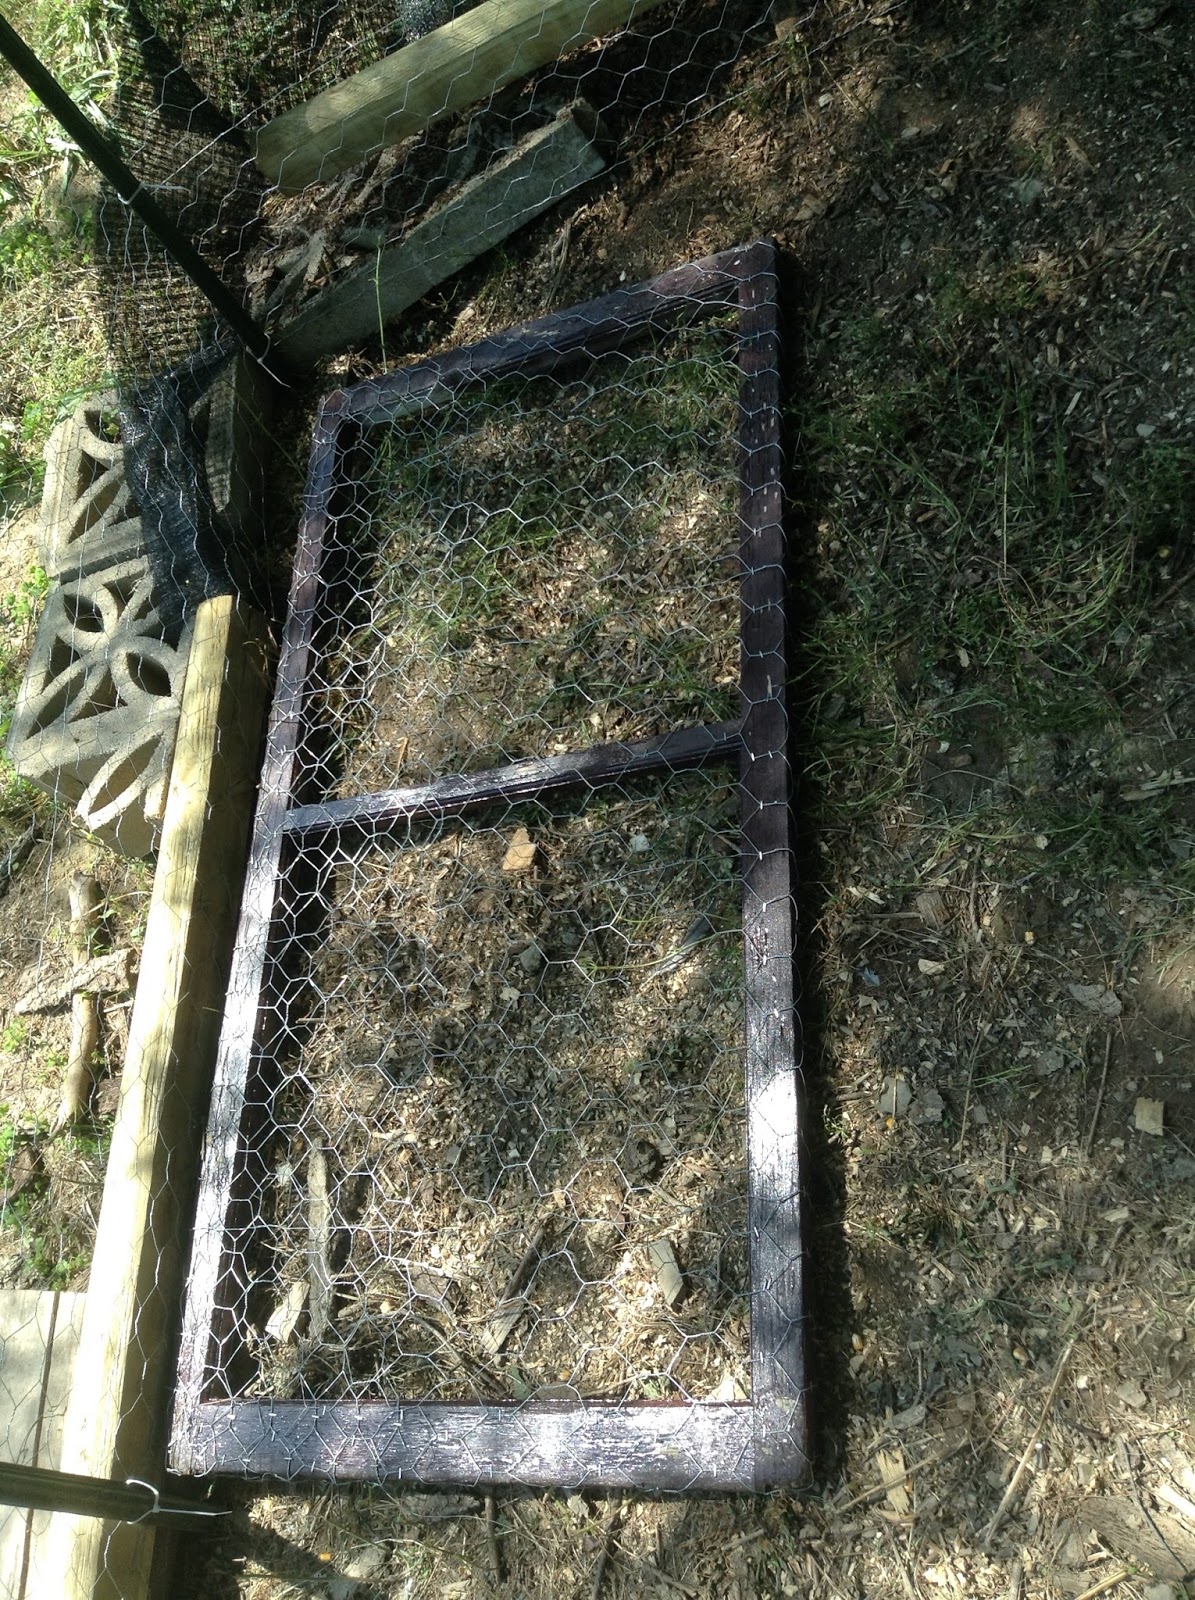
Chickens like to scratch the ground and the dirt can build up. This instinct is evident in a run that doesn't move. There is a solution: The grazing frame. I built mine out of an old screen window frame.  I took off the hinges and the old screen. I added chicken wire via my trusty staple gun. Then I painted with the same brown rustoleum paint I used for other weather proofing around the coop.

I started with an old screen window my husband brought home ages ago.

 I stapled the chicken wire around the frame. I removed the other wire since it was not working for me but against me.

I made the wire as tight as I could, that's a lot of stapling but it was worth it... or that's what I keep telling myself and my aching hand.

 Then I painted the frame, I chose brown for everything. My gutters on my house are brown, that was the only deciding factor.

Then, I placed it in the run. You can see my decorative concrete blocks in the corner. This was before I installed the landscape timbers, which included more stapling. 

So here is a recap of the process:

It took about 2 hours because my helpers were a bit busy at the time.

August 7, 2017

Ceaberry's Homesteading: Chickens -- Building the Coop and Run


I have been wanting chickens since I was a little girl. I always dreamed of farm fresh eggs and just the general joy that chickens bring to your life. Well, we had an opportunity come up where our direct neighbor was selling chickens, and giving away roosters. I needed a coop, and fast. We had been "discussing" a coop and plans for almost 4 years. One day, I just said enough planning and went out and built a coop and run.

We had a plastic storage building when we had the angora bunnies. It was then turned into a storage shed of junk. It is a 7x7 Rubbermaid building we bought at a hardware store (hint it's colors are exactly the same as a big box store). We bought everything else from a local hardware store. It was costly and yes you can do it for a lot cheaper. I am of the mindset of doing it once, making minor adjustments and not needing to reinvest too much into the structure.


So, 7x7 building. We raised it off the ground with a two level high cinder block pattern that allowed for structure but the chickens could get in and have different "rooms" they could occupy. We put ply board underneath it, in hindsight we needed 3/4in thick but I can always take the building off the supports and replace this with thicker ply board. We then used repurposed wood and chicken wire for the sides of the area under the coop to make it critter proof and chicken escape proof. My chickens go under this area ALL the time so it was well worth the extra effort.


We modified the building by cutting two windows and a door. I put chicken wire in the windows and made up a contraption for the door with a cutting board and some grooved boards. I attached a rope to it and put it through the side of the coop where i used two deck screws for the secure spot of the rope outside.


We had a changing table left over from the bunnies which fit the cat litter pails perfectly (or purrfectly?), 3 across and 3 tiers high so 9 in total if we wanted to have that many. Mine love these nesting boxes with just some pine shavings and a dummy egg inside.


The bunny cages used to sit on a pic pipe stand I made when I was first expecting Penelope (like 4 days before I found out I was expecting her). They are excellent roosts. I put a tarp hung with curtain rod hangers along the back like a hammock, yeah... a poop hammock. I added water and food and the inside was done. Who knew chickens were so finicky?


Now for the run, that was done in stages and since we added 4 flighty hens after our first purchase we added bird netting to the top. We used green t-posts to make the secure points for the chicken wire. How did we attach them? Zip-ties, four to each post. Then we (I mean my brother) drove them and the wooden posts in the ground. This allowed for the weird shape we had to go in to allow access to another building. Then we put chicken wire around the run and stapled it to the building. I put landscape timbers around the bottom in sections since they were again a wonky shape. I toenailed the separate sections together and stapled it to the wire. This was mostly because the chickens habit of burrowing next to the wire. Then I added a plastic to the top and bird netting. We added a door that was the bottom of a crate my mom's washer came in and so I stapled chicken wire to it and added handles, hinges, and locks.


Painted the exposed areas with Rustoleum and then added gutters for rain collection via a downspout and rain chain.


I stapled a lot of things and I even gain callouses where I used the staple gun so many times. It was completed in 3 days or about 12 hours of work with 3 people. My chickens seem to love it and it is easy to clean and maintain.