Showing posts with label coop. Show all posts

September 26, 2017

Ceaberry's Homesteading: Second Coop

For our little chicken, bought for a mere $2, we built a whole new coop. Well, technically Mr. Native Farmer coerced me into building a new coop. While I still need to work out the wheels, we built a coop out of an old bunny hutch my husband brought home one day to be my actual coop (now he sees why I laughed when he said it would house my 6 chickens I originally planned on). We added supports and I stapled around the bottom. We added a ramp and made it a bit more stable. 


We added a metal roof so it wouldn't leak as bad and cut holes in it for windows, which I put more chicken wire in front of to keep critters out. I added latches to the doors and we were in business!


We placed them on a hill near the bushes I cut down earlier this year to help take the grass away for next year's project. 


 Here are the girls in the new coop. There is also a cochin bannie and a silkie rooster.


They make quick work of their run area, even when I extended it. This was after only 1 day! Good chickens!! They have done a good job, but I need to move them toward their final destination, down below the hill. Before I do that I am going to finish putting 4 wheels on it. This coop is easily 300lbs and we have found just two wheels won't work. Now that I actually have the right boring tool it should be easier to complete!


Now on to something a little less pleasant... Mr. Native Farmer had gotten a rooster from the farmer's market and he was gorgeous! We were excited to add him to the flock. Unfortunately less than a week after having him he had massive heart failure and died within a day. Big Joe will be forever missed even though he was only with us a short amount of time. A combination of pecking order and dogs attacking our coop was too much for him in that short week.


August 21, 2017

Ceaberry's Homesteading: Summer recap

It is now Mid-August and I am looking towards fall. I will be not looking up at the eclipse that is happening today, be safe and smart about enjoying the eclipse. I have my garden winding down and in a near future video I will show you what my garden looks like now that some things have been harvested and my plans for next year. My next posts will be more about what to do with your harvests, big or small. To enable me to do this I have looked to good old Pinterest for inspiration and ideas and to YouTube for wonderful how-to videos. 


I hope your week is wonderful! Happy Crafting and Homesteading!

August 11, 2017

Ceaberry's Homesteading: Chickens -- Egg Collecting

The reason I agreed to 4 more chickens was for the eggs. When I first got my pullets our neighbor graciously gave us two dozen eggs. I think she wanted to show that they would be small in the beginning but would increase in size eventually.


So the first day we got the chickens, they didn't lay any eggs. We received them around 6 PM so they were done laying for the day. However, the next day the nesting boxes proved to be perfect for them. 


There are dummy eggs in the nest boxes as well (the two larger ones). My kids were really excited to collect some eggs from the nesting boxes.


These are our first few eggs!! We have gotten over 60+ since getting the 4 hens and our pullets should start laying at the end of this month!


August 9, 2017

Ceaberry's Homesteading: Chickens -- Adding a Grazing Frame

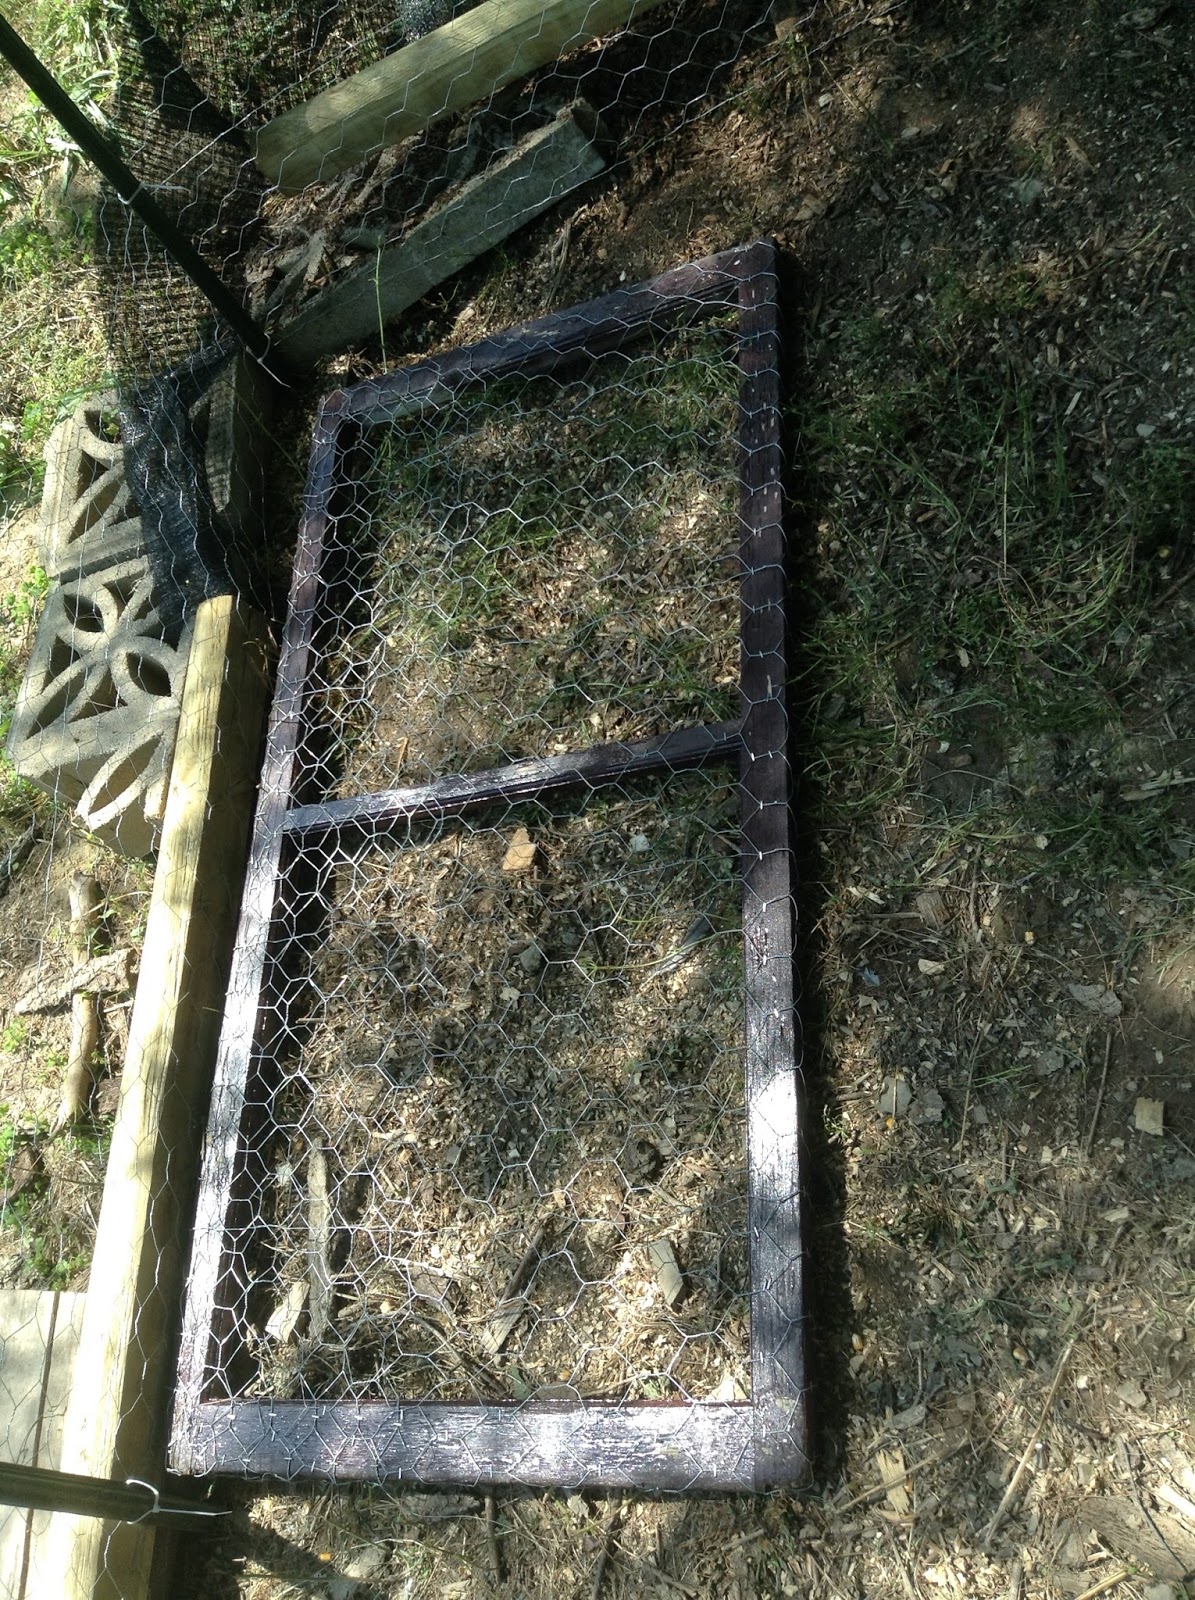
Chickens like to scratch the ground and the dirt can build up. This instinct is evident in a run that doesn't move. There is a solution: The grazing frame. I built mine out of an old screen window frame.  I took off the hinges and the old screen. I added chicken wire via my trusty staple gun. Then I painted with the same brown rustoleum paint I used for other weather proofing around the coop.

I started with an old screen window my husband brought home ages ago.

 I stapled the chicken wire around the frame. I removed the other wire since it was not working for me but against me.

I made the wire as tight as I could, that's a lot of stapling but it was worth it... or that's what I keep telling myself and my aching hand.

 Then I painted the frame, I chose brown for everything. My gutters on my house are brown, that was the only deciding factor.

Then, I placed it in the run. You can see my decorative concrete blocks in the corner. This was before I installed the landscape timbers, which included more stapling. 

So here is a recap of the process:

It took about 2 hours because my helpers were a bit busy at the time.

August 8, 2017

Ceaberry's Homesteading: Chickens -- Getting the Chickens

Our now 12 chickens came in two waves. My husband, ever the gossiper, was saying how he has wanted chickens to our neighbor. She said she had a few to off load if we wanted them. Well, that set into motion a bunch of events, including building the coop and run; creating a new egg gathering apron, and researching everything about chickens... and yes, that includes having to cull them.

To "cull" means to kill a diseased or malformed or injured animal for the sake and welfare of the animal. Homesteading has its not-so-pleasant moments and culling is an unfortunate side effect of owning livestock (which is how chickens are classified). If you do not know, I came across the "C" word with bunnies and thankfully they never needed that but it was a possibility. I live on a beef farm so you can see, culling is sometimes necessary.

We gather up the girls and get them in muck boots and farming clothes, ready for anything. We are all in farm clothes and shoes. Their house is high on a hill and beautiful, and pretty muck free so we looked a bit over dressed, but you never know. We saw the pullets in a coop/run area and there were 8 of them, but one she thought was a rooster. There were 6 rooster pullets in the run next to the pullet hens. We were there for 5 (at most) hens only. We left with 7 hens and a rooster... I am still not sure but I believe my husband said something like "well if we are going to take that many why not just take them all." Enabler. These were all pullets, that means they aren't mature yet.

You can see what I consider "farm wear" for my kids and my husband. Yup, a bit more frilly then normal clothes (we were going to someone else's house) but washable shoes. 


Now we got: 1. Rooster-- half silver-laced sebright and half australorp; 2. Hens -- 2 sebright bantams, 2 golden laced wyandottes, and 3 australorps (they have some polish in them due to white tipped wings).

These are our first pullet hens, that is a cat/small dog carrier that my mom used to carry  7 pullets in coincidentally. She let us borrow it for transporting.

This is our rooster: Diamond Joe.

Our pullets were happy, she told me they may peck at the rooster over night. Worried like well... a mother hen, I went to see him the next morning. I opened the coop to find all the girls in a circle and our rooster, now named Diamond Joe?? In the middle. I think he will be fine.
Our pullets enjoying their run.
Some chicken action.

Showing off their feathers.

About a week later I got a message that something got a rooster that was guarding her favorite chickens and she was really worried (since they roosted in the trees) that something would get them as well. So we got 4 more chickens, proper egg laying ones. Two sebrights purebred, and 2 brown leghorns, I would say they are purebred but one lays a tinted egg which leghorns don't do. They melded into the flock beautifully and now we have 11 hens and 1 rooster (a bit more then the 5 hens I wanted to start with originally).
These are the sebrights, a bit shy at first hanging out in the coop. 

Our Brown Leghorns, they are the "twins" as we call them. Very fiesty.
Yes, our kittens absolutely love birdwatching. Especially, my Scottish kitty Simba.

Here are the sebrights plus a leghorn. Funny enough the pullet in the picture is one of the chicks of the sebrights and a wyandotte (I believe because of the feather lacing).

Now I am getting teased about chicks... like getting teased about my children and me having more, I think its because they are beautiful. My rooster is downright gorgeous. People want to see them have babies, and they are all very pretty but chicks is not in my future. We are hoping to get an Easter egger in the spring (a friend is hatching chicks and he put one in there for me).

August 7, 2017

Ceaberry's Homesteading: Chickens -- Building the Coop and Run


I have been wanting chickens since I was a little girl. I always dreamed of farm fresh eggs and just the general joy that chickens bring to your life. Well, we had an opportunity come up where our direct neighbor was selling chickens, and giving away roosters. I needed a coop, and fast. We had been "discussing" a coop and plans for almost 4 years. One day, I just said enough planning and went out and built a coop and run.

We had a plastic storage building when we had the angora bunnies. It was then turned into a storage shed of junk. It is a 7x7 Rubbermaid building we bought at a hardware store (hint it's colors are exactly the same as a big box store). We bought everything else from a local hardware store. It was costly and yes you can do it for a lot cheaper. I am of the mindset of doing it once, making minor adjustments and not needing to reinvest too much into the structure.


So, 7x7 building. We raised it off the ground with a two level high cinder block pattern that allowed for structure but the chickens could get in and have different "rooms" they could occupy. We put ply board underneath it, in hindsight we needed 3/4in thick but I can always take the building off the supports and replace this with thicker ply board. We then used repurposed wood and chicken wire for the sides of the area under the coop to make it critter proof and chicken escape proof. My chickens go under this area ALL the time so it was well worth the extra effort.


We modified the building by cutting two windows and a door. I put chicken wire in the windows and made up a contraption for the door with a cutting board and some grooved boards. I attached a rope to it and put it through the side of the coop where i used two deck screws for the secure spot of the rope outside.


We had a changing table left over from the bunnies which fit the cat litter pails perfectly (or purrfectly?), 3 across and 3 tiers high so 9 in total if we wanted to have that many. Mine love these nesting boxes with just some pine shavings and a dummy egg inside.


The bunny cages used to sit on a pic pipe stand I made when I was first expecting Penelope (like 4 days before I found out I was expecting her). They are excellent roosts. I put a tarp hung with curtain rod hangers along the back like a hammock, yeah... a poop hammock. I added water and food and the inside was done. Who knew chickens were so finicky?


Now for the run, that was done in stages and since we added 4 flighty hens after our first purchase we added bird netting to the top. We used green t-posts to make the secure points for the chicken wire. How did we attach them? Zip-ties, four to each post. Then we (I mean my brother) drove them and the wooden posts in the ground. This allowed for the weird shape we had to go in to allow access to another building. Then we put chicken wire around the run and stapled it to the building. I put landscape timbers around the bottom in sections since they were again a wonky shape. I toenailed the separate sections together and stapled it to the wire. This was mostly because the chickens habit of burrowing next to the wire. Then I added a plastic to the top and bird netting. We added a door that was the bottom of a crate my mom's washer came in and so I stapled chicken wire to it and added handles, hinges, and locks.


Painted the exposed areas with Rustoleum and then added gutters for rain collection via a downspout and rain chain.


I stapled a lot of things and I even gain callouses where I used the staple gun so many times. It was completed in 3 days or about 12 hours of work with 3 people. My chickens seem to love it and it is easy to clean and maintain.