


January 25, 2017
January 17, 2017
January 15, 2017
Road to Macaroons: Making the Macarons!!
Time to get down to business!! I found a YouTube Video that had sort of the recipe on it, I followed the videos instead but I added coffee to my ganache (again, two kids 1 year and 2.75 years old).
So I sifted the flour again, weighed it at 125g. Then I sifted the powdered (confectioner) sugar. Then I combined them, by sifting them again. I added the coco powder and instant coffee at this point.


Out of the oven after 15 minutes!! First batch, look at that piping job... Yup I cringe too.


I started on the egg whites. Let me say, I thought I over whisked them in BOTH batches because I got a hollow bit at the top, turns out my oven was a smidge too high when baking. After 2 days of "maturing" the air space went away and they were PERFECT!! So if you didn't know you're supposed to age your Macrons for 24 hours at least in the fridge. That way the filing and the cookie doe their "thing" and become perfect. Anyways back to egg whites. I used my KitchenAid mixer but you can use a hand mixer. It took about 5-7min from start to finish (the second time my eggs were cold and still only took 7min). I put in cream of tartar for the help, heck I want them to look good so why not?!


Mix until stiff peaks form. THIS is stiff peaks below. STOP as soon as they do this.

My recipe says to add it in all at once, both of them did say this, well second time round I added them in thirds. Geesh, that was A LOT easier actually.

Let me say something here. This is the piping step. USE A BIG HOLED TIP aka a STAR TIP. Do it. I didn't and it was a mess the first time. The second time, omg you'll see below how much better they were the second time round. Now it says wait 30 minutes for a skin to form. No idea why but mine formed within piping time (about 10 minutes both times). This didn't allow me to get the air bubbles out creating some uneven raising but meh they worked. So in the oven they went. Feet, oh glorious almost impossible to get feet... I got them with EVERY one both times!!

Out of the oven after 15 minutes!! First batch, look at that piping job... Yup I cringe too.


Here is my ganache (which was enough for two batches of macarons. This is the star tip I used to pipe the second batch of macarons.

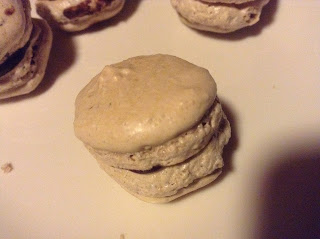
Filing and pairing. They are delicious!!


NOW the second batch. Look at THAT piping!! Yay, so much better, and I didn't use templates for either batch. Seriously these were for me and my husband, not to sell!


Want to make your own? DO it, but get the almond flour from the store. It was a bit too much, however quality was kept the whole time and they are so delicious!
January 14, 2017
Road to Pricing: The Actual Calculations
SO now to the kitty gritty, sometimes I use CraftyBase to get my prices correct but most of the time I am almost right on the money just using Numbers (Excel) program.
Stitch Markers -- Wage is $8/hr. This isn't as skilled as my yarn dyeing but it calculates my cost if I ever needed to pay someone else to do it for me (read my Husband).
Costs: Rings, beads, superglue, toothpicks, and packaging (tins and labels)
Shipping: 2.75 for shipping small items (I get my materials for free from the USPS).
Overhead: Use of pliers. I have excellent pliers so overhead is very low.
Profit: Normally 100% (times the number by 2).
So Costs+Overhead = Base Cost x 2= Adds Profit for retail + 2.75 = Retail price for Etsy. My prices for Farmer's market do not include shipping, which is why they are cheaper then my Etsy prices.
Hand-Dyed Yarn -- Wage $10/hr. It should really be more like $12 after 6 years but you'll see it really doesn't matter. I don't base my prices on the process but on the bases I buy.
Costs: Yarn Bases, dyes, reactive agents, ties, and packaging (labels and ziplock bags I buy to make sure everything nice and dry).
Shipping: 6.10, I ship priority because I get the shipping materials for free. If I was to buy them and go first class mail it costs more, therefore costing my customers more and they have to wait longer.
Overhead: Steel pots, tongs, my drying rack, my ball winder, my skein winder, and water (which is free for me but the power used to run it is not). These seem like a lot of over head but it isn't. I have been using the same pots for 6 years and tongs for 4 years, my ball winder is 8 years old and my skein winder is the only thing showing wear after 3 years.
Profit: Normally 100% (times the number by 2).
Now, here is my calculations, they don't make sense to anyone but me. Try it on your own stuff and you'll see how nicely prices work out to be market value without going over or under board.
Yarn Base Cost + other costs = Cost to me
((Grams of Yarn base/Yardage of Base)xCost to me)+Overhead + Shipping = Base Cost
(Base Cost x 2 (or 1.75 if its a mini skein)) + Wage for packaging/Listing (that's a flat rate, again if I had to pay someone to do it) = Retail Price for Etsy
Yup, what the what?! I do what, with what and why is shipping before the profit mark up??
So I found that prices went awry when I did a "wage" for my time spent, I use to dye ONE skein in 3 hours now I dye 4 skeins in 30 minutes. So wage per hour is now really not a factor. What is a factor is what I use in the process and its based on weight and yardage to how much materials and really time it takes to produce an item. I am a math wizard, its my secondary passion (I also love science so you can see how really fiber arts makes my brain just happy).
Now let's do an example, because I love made up examples:
Yarn base cost: 4.00 (I wish)
Other costs: 1.00
Grams of Yarn Base: 100g (my normal skein weight)
Yardage of Yarn Base: 400 yards (around my normal skein length)
Overhead: 1.00
Shipping: 6.10, you can look this up on USPS.
Wage for packaging/Listing/Photography: 1.50 (no this isn't the flat rate wage, remember made up numbers)
Okie dokie:
4.00 +1.00 = 5.00
((100/400) x 5.00) + 1.00 + 6.10 = 8.35
(8.35 x 2) + 1.50 = 18.20 round to 19
Wholesale = 18.20/2.5 = 7.28 round to 8
If I added Shipping AFTER I added profit: $12.10 with wholesale being $4.84. Yup it doesn't work, so it may seem ridiculous to do it before hand but its how I get to a fair market value. Most 400yd/100g skeins are $18-$26 on Etsy for most small scale dyers. If I was to add shipping after, I don't make enough wholesale to cover my costs and it puts my yarn WELL under market value.
If you want to try my crazy go ahead. If not look at another blog or other post on how you're "supposed" to do it. As I said my wage has absolutely nothing to do with my pricing. If I do 1 skein in 30 minutes of total work: thats (5.00 for cost + 5.00 for labor) x 2 for profit = 20.00 then flat rate for packing plus shipping that's 27.70 at least. That puts me OVER of the range and thats where you get 400yd skeins at $40+, which while I am all for valuing your time and work, my stuff comes from the materials I use, not the time it takes me to do it. However, self striping and gradient stuff, I price with a bit higher "other cost" and "overhead" because it requires more steps and equipment.
So on the skein above, my profit becomes my wage. So costs on the skein is 13.60 So I make 5.40 on the skein. That looks oddly like the 5.00 quoted above? If I did 100s of skeins then maybe I might change my formula, I rarely do wholesale so I save on "costs" which means you do too.
Hand-Spun Yarn -- Wage $10-12/hr (again it doesn't matter per say)
Costs: Fiber Bases, dyes, reactive agents, ties, and packaging (labels and ziplock bags I buy to make sure everything nice and dry).
Shipping: 2.75
Overhead: Ashford Blending Board, Hansen MiniSpinner, my ball winder, my skein winder, and water.
Price per Yard: (This is where my "wage" comes in)
Single: 0.10
2Ply Bulky: 0.31 (this includes the singles price)
2Ply Sport: 0.33
3Ply Bulky: 0.41
These are normal PPY as I have done by MARKET Value. So there is a THIRD pricing scheme... got to love a multifaceted business. They are based on skill and time and materials used plus normal pricing ranges of SOLD skeins on Etsy, I usually find a business that mostly does hand-spun and go from there. (As PawnStars always says: You can price something at whatever you want but unless it sells at that price it isn't worth that amount).
Yardage Plied x PPY = Cost Price + Overhead + Shipping = Etsy Retail
So there are my pricing schemes for everyone to see. These work in the "real" world of Etsy and Farmer's Market. Have fun!
January 13, 2017
Road to Macaroons: Drying the almonds and Almond Flour
After sprouting it is CRITICAL to dry your almonds. Please, DRY THEM all the way!! Let me tell you a little story... So I didn't dry mine all the way. I put my oven on Warm and dried them for about an hour. So I put my almonds in my food processor, they became an oily MESS!! So I made Batch 1 of the marzipan potatoes but they were chunky and uck...
So the next day, I dried them a bit more. Then into the food processor more went with powdered sugar because everyone says to do it so you don't get almond butter. Yup... I made marzipan again but I over whipped it and it was soon much smoother. Lesson: don't be shy it takes A LOT to make almond butter, it really does.
So back in the oven the almonds went on WARM. So I figured this was enough time so in the BLENDER (I don't have a lot of water at my disposal so I had to switch machines) they went. I put in a little bit of granulated sugar to add a bit of grit. Guess what? Still too oily. Angry by this point, the kids and husband going crazy, I lost my timidness. So up went the heat to 200F and I left the now sugary almond chunks in there for 2 hours. Well, that worked!!! Dry as a bone! They needed 200F in MY oven to actually dry out. See, you're on a time clock once you sprout almonds, they go bad really quickly.


So back to my now clean blender and voila, almond flour!! You can see me sifting it through a metal strainer (required) and a silicone spatula (also required).


My Road to Pricing: How does this crazy lady price her products?
So I wrote a book on my thoughts about pricing and the road it took for me to get to my pricing. There are MANY advice websites out there to get you on the right track to your pricing. This is NOT one of those websites. This is how I get to my pricing.
Let me just say, for almost everything I price at $10.00/hr. In West Virginia the minimum wage is $8.75/hr (for 2016 it was $8.00). I am considered a "skilled" worker. Most fiber artists are between minimum wage (or even below it) to $20/hr. My wage is enough to make it "worth it" for me to stay in business as a side income for our family. I am a stay at home mom of two children (you can see their ages above and yes, please say a little prayer for my sanity). I am not a Momepenuer, I started my business in 2011, about 3 years before my first kid was even born, and even before I was married! This isn't a business I do because I wanted extra money; I want an income and this is my CAREER. I have a Masters in Human Osteoarchaeology, which has nothing to do with the fiber arts.
Alright so you know my hourly wage, a lot of artists don't divulge how much they make but we are technically freelancers, and they say how much they want for a job done why not be open to my customers?
So I have a wholesale account with my yarn base supplier, so do A LOT of my competitors, including the larger brands have suspiciously similar bases. This next year I am expanding my wholesale base, that brings better ranges of bases. I will be retiring a lot of my older bases to move on to newer more exciting bases. I have at least 35 bases. That's an amazing amount, but I love the fiber arts and as a buyer as well as a seller I want to offer range. However, it stretches me a bit thin, don't get me wrong I DON'T buy all 35 bases, I watch the market and I have stand-ins when market preferences change.
I have a business license and I pay taxes. Yep, I am a legit business and I pay "into the system" like I am supposed to do. I have done so from the get go. I am trademarked and copyrighted as well.
I have an Ashford traveller, a Hansen MiniSpinner, an Ashford Blending board and drum carder, two stainless steel pots, some dyes and reactive agents (read citric acid), tongs, a nina spin dryer, a wood stove, SOAK fiber wash, ball winder, papa bear skein winder, and labels/business cards. Plus shipping supplies and cleaning supplies. So if you want to start a business, gain slowly your equipment and you don't need "the best" but it does help to have higher quality.
Get to the Prices you say? I have been, all what I have listed is: Wage, base price, and overhead. Thats pretty much the normal calculations for pricing. My next post will really have my actual calculations in them.
January 12, 2017
My Road to Pricing: Learning I have Value
There has been a lot of murmurs in the fiber arts community about fair wages and pricing of our products. There has been some opposition as well to the views of Abby Franquemont. Abby is trying to explain that fiber artists, in particular teachers of classes at venues, are not being treated or paid fairly. While this saddens me, I don't think it was shock to me. As a person "in the biz" I understand completely the wrongdoing of the market and of other fiber artists. I use to be one of those wrongdoers (on accident as most are of course) so I can speak about my road to remediation and redemption. I have been to three venues (money and travel time aren't my friends so I am limited to what I can visit). When I was in Edinburgh, I went to the first and second years of The Glasgow School of Yarn and to the first year of The Edinburgh Yarn Festival (fun fact if you ever go to this festival if you keep walking to the corner and turn and go about halfway down the street there is a heavy looking door, next to that door is a window... that used to be where I lived! LOL. Don't scare the now resident please though). While now living in rural West Virginia I have been to Maryland Sheep and Wool. I have only taken classes at TGSY, one each year. I don't remember what I paid for them, but they were more then worth whatever menial amount it cost to attend. I took the Plug and Play shawl class and a lovely spinning class on how to spin thinner.
To think that maybe my teachers, who were beyond happy go lucky and very informative, might be mistreated at other festivals was unthinkable. So based on this I took a hard look at my shop, to see if I was part of the problem or part of the solution. I found I was part of the problem, competitively underselling my products based on jaded experiences I had at farmer's markets and craft fairs. So I decided to become part of the solution, allowing for fair market prices of my work AND the work of others. I am responsible for supply and demand, therefore I am responsible for not only myself but my fellow artists getting the value we all deserve. My prices are higher then some other dyers, either due to a wholesale account that would be lower if I actually sold more or the included shipping I offer to not only the USA but to Canada. But, my prices are also lower then A LOT of the market of "big business" indie dyers, I don't have the following for those prices, I don't make repeatable colors, and I definitely don't have the sources to sell at that price point (yet).
I was jaded at the first craft fair I went to, they put me in a horrible place, I was the ONLY fiber artist there, and I wasn't even mentioned in the bulletin even though I paid my dues like everyone else. I sold NOTHING, yup 8 HOURS and nothing sold. I lost 50GBP. My little business can't handle those kinds of losses but it took time to recover. I changed what I sold, rebranded and went on my merry way to Etsy. I sold stuff here and there, fiber just isn't my market, hand dyed yarns and mainly hand-spun yarns are my forte. When I moved back to the USA, I did a farmer's market with some inventory I had left (I did a consignment to Ginger Twist Studios right before I left... she sold out quickly upon opening which helped my confidence). Much to the chagrin of my fellow farmer's market vendors, I sold at least 1 thing EVERY Saturday I set-up, sometimes outselling them as well (not that we were in a competition but you know how it goes).
My hand-spun has always been a struggle for me to price. I want people to buy it but how do I price it? Some of the fiber I got for free and some I had well before I owned a business. So I undersold... by a lot. Now I have bit the bullet and figured out my prices. Again, I am trying to be part of the solution, I need to price so not only my work but my fellow artists' work is taken seriously. So in the next post I will explain my pricing methods, they aren't conventional and its why it makes it harder for people to figure out how I get to my prices but they work for me and my market.
So to finish off this novel of a post, I chose to be a fiber artist. I dedicated YEARS of my life to the business, education of my fiber arts, and honing my skills that now I can dye and spin productively. You as a consumer expect to pay for my experience and expertise, you want good quality items that don't have problems, fair pricing, and good customer service. You as a customer are not paying for my living however, that's not your job, it's mine. You see a good price on a yarn that looks identical to mine and you're going to buy the cheaper yarn, even though it may be the exact same quality as mine. However, that person may just be starting out, they haven't learned how their yarn reacts or how customers react or if the market swings out of favor their profit margins make them go out of business. Only because I didn't get sales, it made me look at my products in a different light. I looked "cheap" so I decided to VALUE myself and my products for how good they really were and what prices they should be listed for on Etsy. The Farner's Market helped with that, I got to see what people wanted, what they liked as colors, what they would change, and what they gravitated towards. That took two years to compile that knowledge base, I live in a county of 9000 people and I made connections where there wasn't any before. Unlike the UK, fiber arts is still this granny or hipster thing to do and it is not for the masses. I am competing in a much more supplied market then before and it has taken its toll but I as I rebuild I hope just sheer perseverance will help, plus my husband is an awesome salesman, he talked bikers into buying pink yarn!
January 11, 2017
Road to Macaroons: Blanching and Sprouting Almonds
So I wanted to learn to make the mysterious French Macaroon (Macron). My husband, Dear Farmer, and I are coffee fanatics (we do have 2 kids under the age of three). So I looked up a recipe for Coffee macarons with a chocolate ganache filling.
So I looked up the recipe, wrote down the ingredients to get at my local grocery store. Believe it or not, I live close to 1.5 hours away from the nearest large grocery chain. I got EVERYTHING on the list... except almond flour. If you don't know, macarons MAIN ingredient is almond flour.
Crud. So I bought almonds instead. FOUR, 6oz cans at $3.25 each (if you want to know the brand I bought look for green lids). I was making eggless Marzipan Potatoes as well, thank you Knitmore Girls for the idea. Guess what the main ingredient of marzipan potatoes are by chance?? Yup, almond flour.
So, making Almond Flour became my first step. So I looked it up on WikiHow, so scientific right? It says to blanch the almonds AND to sprout them. Oh... goodie. So step one, blanch the almonds by boiling water and putting 2 cans in the water for 1 minute (more like 5 if you don't want to go crazy). Two cans is more manageable (its what is pictured below so you can see how many are in 2 cans). Two cans will yield just over 1 1/3 cups of almonds.
You can see my setup below: 1. Pot for the boiling, 2. Strainer for the straining of the water off, but keep a little water in the pot, it helps keep the almonds warm, 3. Bowl for the skins, 4. Measuring cup or something else glass or metal to hold the almonds (it keeps the fat from soaking into the vessel), 5. An absorbent surface because it drips water, mine is a cotton prefold diaper (its clean of course). After you have strained the almonds then work quickly by popping the almonds out of their skins, if you waited 5 minutes in the hot water then they should all come out easily. A layer of water forms under the skin and so it pops off nicely, thus the absorbent layer. If they are giving you trouble put them back in the strainer, the stem from the water you saved in the pot will help open the skins without adding more water.

So Blanching.... DONE. Now to the sprouting. Basically you add double the water to the amount of almonds you have, cover, and let them sit for 8-12 HOURS (again WikiHow showed me how to do this step). You rinse out the water every 3-4 hours. You do not have to sprout your almonds, most commercial almond flours don't and some don't even use blanched almonds. Macrons are a delicacy, at least remove the skins if you make your own almond flour. Sprouting not only gains your yield (they double in size over the sprouting period), but it takes away the harmful digestive inhibiting enzymes that almonds produce when eaten. If you eat whole almonds your body will naturally stop when enough is reached, with almond flour or anything baked with almond flour somehow this signal is ignored so people tend to overeat causing harm. Well, I plan on devouring my macarons without guilt (they are about 200 calories each so I need not have to worry about a tummy ache too).
Here is my sprouting process, yes that's a flour sack towel diaper I got from the hospital when my Calamity was born (again, clean of course). After four hours the water was cloudy and after 8 hours they were almost ready, I let them go 12 hours. They had started to open, which means the sprouting process was complete.


January 9, 2017
Ceaberry's Haberdashery Hand-spun Yarn
In previous 3 years I have not offered my hand-spun in the Etsy shop. This is because it was EXCLUSIVE to the Farmer's Market I attend during the summer months. By the way if you would like to see me in person I will be there this year, almost every Saturday from May to October. I was not there last year due to having two little humans to raise.
However, I have now gotten a special business tool that was specifically dropped off by Santa to help aid in my hand-spun production for the shop. It is an Ashford Blending Board, that came with Frozen fibers. After receiving it and combining my new found love of rolags I can now up my production of hand-spun. I sold a lot of my hand-spun when I was in Scotland and of course it was there when Ginger Twist Studios opened her doors to the public in 2013.


My first rolags were done with my normal thickness of spinning which results in fluffy Bulky to Super Bulky thick and thin yarn.


The second set I did, I thinned out my spinning so the yarn is now light fingering to sport weight thick and thin yarn.


Then I did a pink gradient yarn with an alternating "background" colors of pink and white for my girls. Yes, it is really for my girls, sorry if you like pink.


I have a few more rolags set up to be spun, it even includes a purple-plum-periwinkle gradient.... I have a few more things to make rolags of and some BEAUTIFUL fawn alpaca that I am so itching to get rolags done up and then spin it.

However, I have now gotten a special business tool that was specifically dropped off by Santa to help aid in my hand-spun production for the shop. It is an Ashford Blending Board, that came with Frozen fibers. After receiving it and combining my new found love of rolags I can now up my production of hand-spun. I sold a lot of my hand-spun when I was in Scotland and of course it was there when Ginger Twist Studios opened her doors to the public in 2013.


The second set I did, I thinned out my spinning so the yarn is now light fingering to sport weight thick and thin yarn.


I have a few more rolags set up to be spun, it even includes a purple-plum-periwinkle gradient.... I have a few more things to make rolags of and some BEAUTIFUL fawn alpaca that I am so itching to get rolags done up and then spin it.
 |
| That background is a runner I wove a LONG time ago in |
We have a new face around our house too... Meet Belle. She is our newest kitten that needed a good, indoor dog free, home we could provide for her.

Subscribe to:
Posts (Atom)